
Arrgh! Christmas photo foiled by a 6 year old!
This is a yearly event with us. I try to get a family photo in front of a Christmas tree to put in our album. It turns out it is close to impossible to get everyone looking good in one photo - especially when certain people in the family love to make silly faces.
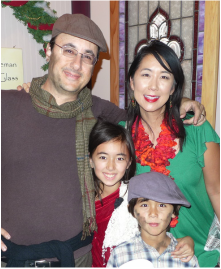
Here is a tutorial on some of the basic techniques and tools that are useful to do basic photo manipulation in Photoshop. These techniques also come in handy for those big group photos where you can never get one perfect shot. We took the photo above at the Dickens Fair in San Francisco.
Luckily, earlier the same day we took this other shot. Usually it is a lot easier to combine photos if they were taken at the same moment in time, but since all these photos were taken indoors with flash, it can work.
Luckily, earlier the same day we took this other shot. Usually it is a lot easier to combine photos if they were taken at the same moment in time, but since all these photos were taken indoors with flash, it can work.
Step 1: Select, Copy & Paste
Photoshop in a Nutshell
Before starting, here is a really basic way of thinking about Photoshop for people who feel daunted by it. There are so many options and capabilities that it can be very confusing.
To make it less daunting, I think of it like this:
For this tutorial we use just a couple of the basic tools but after you work with it for awhile you will probably find that these tools are not necessarily right for your job and others will help you do the job better depending on the photo.
To make it less daunting, I think of it like this:
- Working in Photoshop boils down to Selecting a part of an image and then Doing something to it.
- Most tools and options can be categorized as either a Selection tool or a Doing tool.
- Understanding which Selection tool to use in which circumstance is the key to getting the hang of Photoshop.
For this tutorial we use just a couple of the basic tools but after you work with it for awhile you will probably find that these tools are not necessarily right for your job and others will help you do the job better depending on the photo.
I need to replace the goofy head with this slightly more presentable one. So I select this presentable head and paste it into the other photo. Since the head is an irregular shape the easiest tool to use is the Lasso tool. I roughly select the head with the Lasso tool without worrying much about getting it right.

Copy and Paste the head into the target photo. The head will get pasted into a separate layer on top of the original image so the original image won't be affected for now.
Step 2: Color and Contrast Adjustment
Now make sure the new head matches the old head. In this case the new head is a little brighter and a touch more blue than the target image.
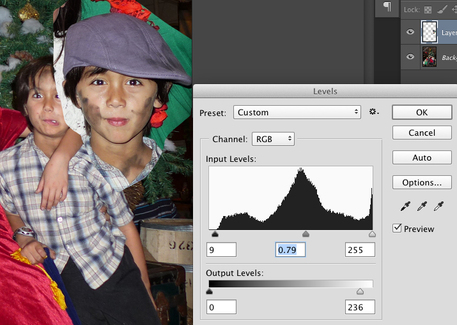
To adjust brightness and contrast, you can use Brightness/Contrast or Levels under the Image: Adjustments Menu. I prefer Levels because there are more options to get it just right. For this step we don't need to select the head because it is on it's own layer and we want to adjust the brightness of the whole head. So there is no need to select a part of the head unless there is just one part of the head that you want to make darker. The only thing you need to do is make sure the layer the head is on is selected.
Play around with the Levels settings until you get the hang of them. Don't go over board. The arrows under the graph affect the Contrast while the 2 arrows on the bar under the graph affect the brightness. For this image I need to make the head darker overall. So I drag the white arrow down a little. When you move the white arrow, you are telling Photoshop that level of gray should be the brightest level in the selected art - not the whole file - just the part of the image that you are modifying at the moment. In this case, we are only modifying the new head. So any parts of the selection that are brighter than that setting get darkened to that level.
Play around with the Levels settings until you get the hang of them. Don't go over board. The arrows under the graph affect the Contrast while the 2 arrows on the bar under the graph affect the brightness. For this image I need to make the head darker overall. So I drag the white arrow down a little. When you move the white arrow, you are telling Photoshop that level of gray should be the brightest level in the selected art - not the whole file - just the part of the image that you are modifying at the moment. In this case, we are only modifying the new head. So any parts of the selection that are brighter than that setting get darkened to that level.
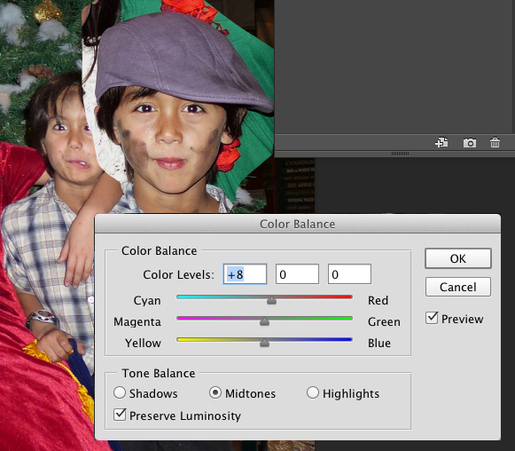
Now Select Color Balance in the Image: Adjustments Menu. Since the original image head looks slightly more red, I adjust the red / cyan slider until it looks right and click ok.
Step 2: Get Rid of All the extra stuff
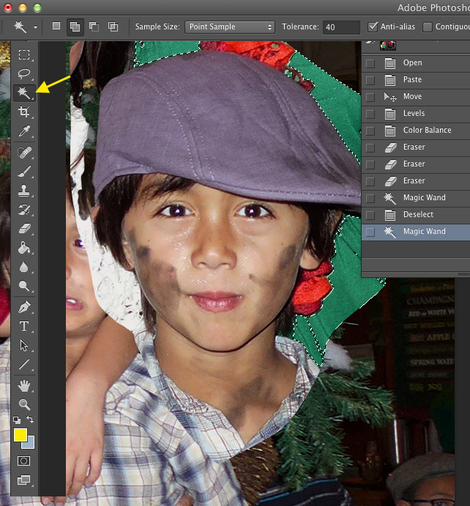
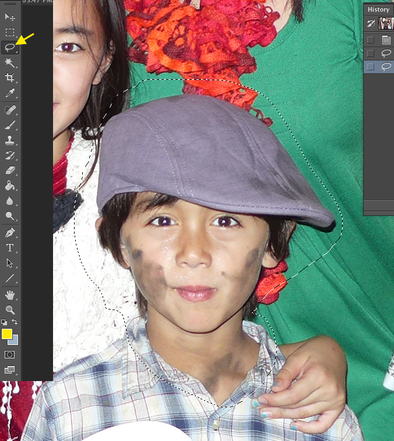
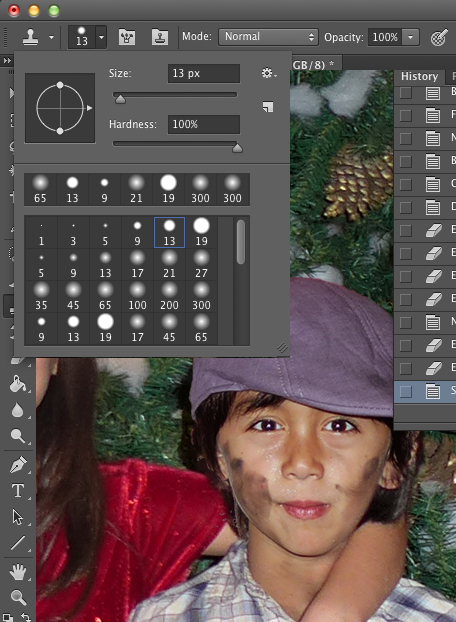
It's easier to use the Magic Wand to select and delete large areas of color rather than using the Lasso or Eraser to to painstakingly trace around the edges
This step will be different depending on your photo, but here, since there are a few blocks of relatively solid color around the head, I use the Magic Wand to select each color area and delete it. Set the tolerance pretty high like around 40 so it will pick up all the gradations of that color block. Here I have the green selected. If you didn't get all of a color, you can try pushing down on the shift key while you click on the areas that were missed the first time around. The Lasso tool should have a plus sign next to it. This will add to the existing selection.
Selecting the red with the Magic Wand picked up some of the red in his face.
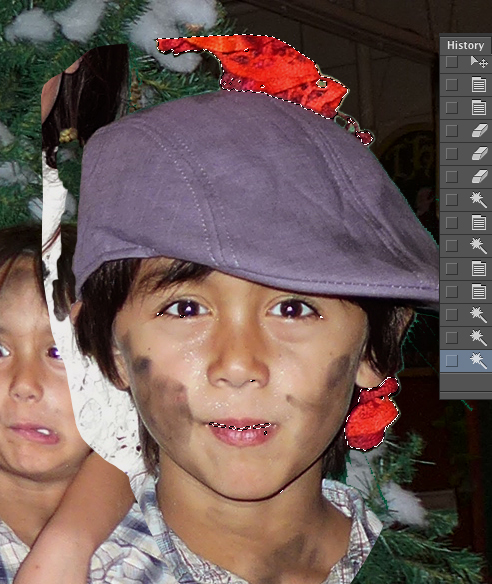
There are certain times when you will end up selecting part of the image that you don't want to delete. See how in the image above, some of his mouth and other points on his face were selected when I selected the red in the background? So you need to deselect those areas while keeping the other areas selected. In this case, the easiest thing to do is use the Lasso tool and hold the Option or Alt key down while you draw around the areas that you don't want to select. The Lasso tool should have a minus sign next to it. After drawing around those areas, they should deselect.
TIP: You can use the Shift Key to add to a selection and the Option or Alt key to subtract from an selection with other selection tools as well. It doesn't work only with Lasso tool.
When you are happy with the area that you have selected, push the delete button. Repeat this until you have gotten rid all the large solid areas of color.
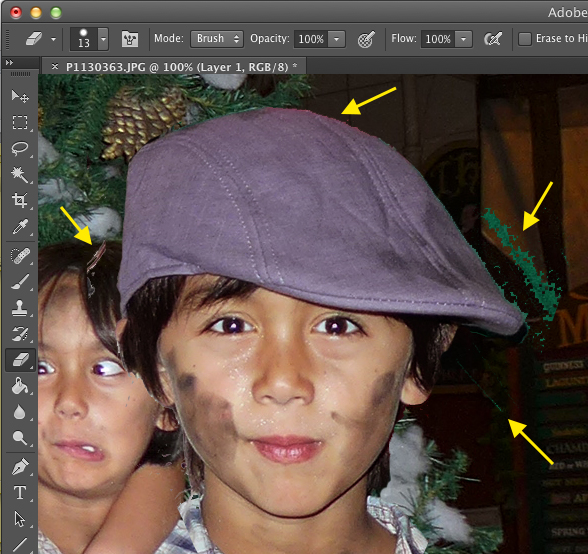
Now use the eraser tool to clean up all the stuff that did not get deleted in the first pass. After choosing the eraser tool, select the appropriate brush shape and size for the job and erase. In this case a medium paintbrush shape is best. Carefully erase around the edge of the head until it is a clean head ready for incorporating into the target image.
Step 4: Scale and Position
 Free Transform | 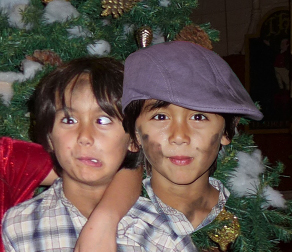 Scaled to size |
Now duplicate the layer that the head in on, because we are going to scale it down and we want to keep the original head that we did all this work on before messing with it. Once you make it smaller you can't change your mind and make it bigger again without losing quality. So duplicate it, then select Edit: Free Transform to scale the head down to the right size. Since we are applying the scale to the entire layer we don't need to select anything in the image, we just select the layer.
These settings are on the Layers window. They can make cool effects. You should explore what they all do. Multiply is one of the more useful ones.
Sometimes it helps to change the layer setting to Multiply so you can see through it. Use the move tool to move the head into position. It can help to overlay the new head onto the old to to make sure the head is really the right size or in the right position. Compare the distance between the facial features. When you are happy with the size and position. Set the layer setting back to Normal.
Step 5: Cleanup
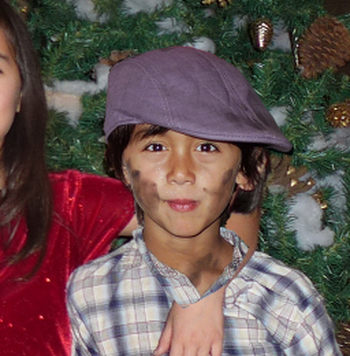
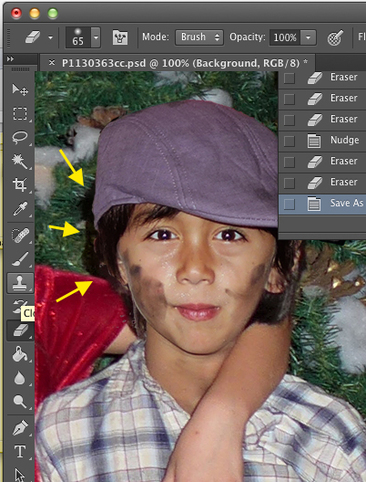
Now we need to clean it up. This usually involves the Eraser tool and the Clone tool. The shape and size of the tool you specify will depend on your photo. In this case we need to work on the neck and make sure that it looks natural when merged with the original photo.
See his neck merges seamlessly with the arm now?
I use the Eraser tool and select a large airbrush shape this time and erase where the neck overlaps with the arm. The edge will be soft so that you can't tell where the new neck and original neck come together.
On the left side of the new head you can see some darkness peaking through from the hair in the original photo. It's not that noticeable, but let's get rid of it anyway. The Christmas tree in the background is the perfect thing to use the Clone tool on. It would be really hard for someone to notice it is doctored up. We need to select the layer that the original photo is on. Clone the Christmas tree and cover up the dark hair peaking through until it looks right.
Here we don't want a soft airbrush tool because the soft translucency will give away that it has been messed with. Here it is best to use a hard paintbrush shape and apply the clone tool sparingly only where you need to cover up. Make sure to keep your original photo so you can always go back to it if you need to.
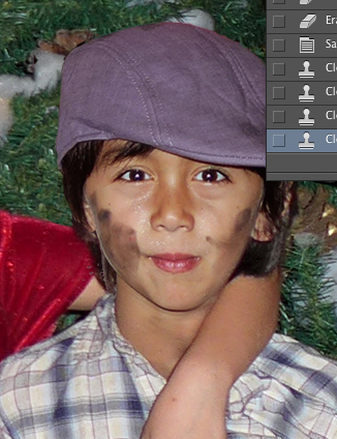
All clean!
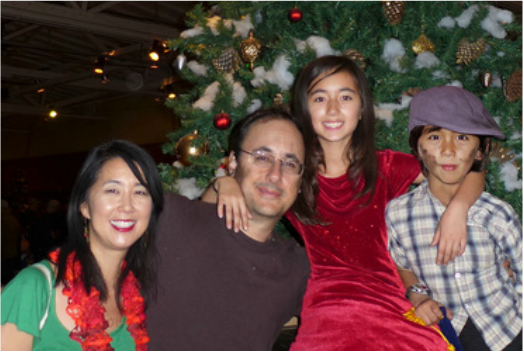
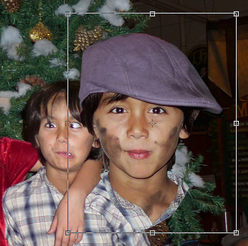
Our family portrait is complete! My little guy grimaced when he saw this and realized he had been thwarted by his mom. Happy Holidays!
 RSS Feed
